Design for Life
Stereo Photography
History
The general principles of stereosocopy, that is showing 3 dimensions on a 2-dimensional surface, are widely believed to have been understood since antiquity - see the History of Stereo Photography site for example. Other authorities dispute this, and even the claim regarding Kepler's Dioptrice, published in 1611, that it 'included a detailed description of the projection theory of human stereo vision' is arguable.
The first explicit and comprehensive theory of binocular vision was certainly that presented by Charles (later Sir Charles) Wheatstone to the Royal Society in 1838 at a time when the first experiments with photography by Fox Talbot and Daguerre had only just begun. (My thanks to Abram Klooswijk for his comments on an earlier version of these two paragraphs).
A couple of decades later there was an entire industry producing and selling stereo photographs, and it is estimated that over a million homes owned a stereoscope - it was the television of its day.
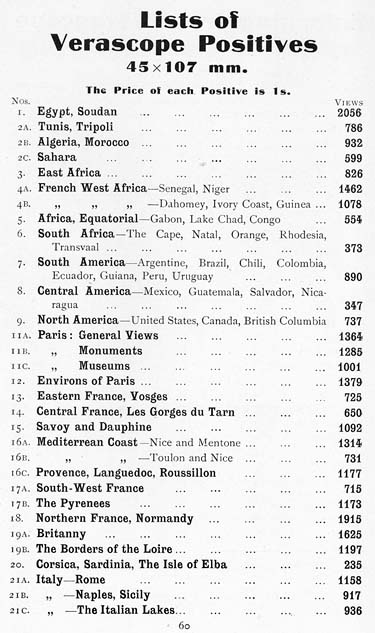
First page of the Jules Richard British catalogue of views, 1914
Photographers travelled the world to bring back vast quantities of images for sale - Jules Richard in France had a collection of 300,000 different stereo photographs, his UK catalogue of 1914 listing over 60,000 different 'Verascope' glass views. In London, George Nottage's catalogues offered over 100,000 images, and in the US, there were many manufacturers of stereoviews; it is estimated that one of the best known, Underhill and Underhill, produced more than 25,000 a day.
How It Works
Depth by perspective
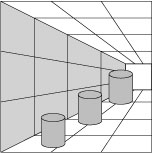
Human beings have many ways of perceiving depth, some of them very subtle. For instance, pale objects seem to be more distant than dark ones; small objects appear farther away than large objects; fast-moving objects seem to be closer than slow-moving ones; and so on. Most of these need only monocular vision; the example alongside shows this clearly - close one eye and the cylinders still appear to recede into the distance.
The most powerful mechanism we have, however, arises from the differences in the images presented to each of our eyes, and stereo photography works by reproducing this effect. A camera with two lenses is used to take a pair of photographs and these are then presented separately to each eye, ensuring that the right eye sees the right picture and the left eye the left picture. There are tiny differences between these two pictures, the left one obviously showing a little more of the left side of objects in the image, and the right one more of the right side.
In addition, the two copies of an object in the foreground of the picture are separated by a millimetre or two less than objects in the background, the difference in separation being proportional to the object's distance from the camera. Taken together, these various differences are sufficient for the brain to reconstruct the image in the same depth as the original view.
Examples of Lartigue Stereos
To view these photographs properly, it is best to use a stereoscope, as it automatically aligns the two pictures and magnifies them to give a big clear highly involving image, but it is possible to see the depth without a stereoscope at all. This is known as 'free viewing' and, although not everybody can do it, if you can it gives the most surprising results of all.
You can free view either by crossing your eyes or by keeping them parallel. Parallel free viewing is harder to learn, but much less tiring to use, so that's what I recommend, and all the stereo pictures on this site are set up for this mode of viewing. It's worth trying to learn: this is how.
How to Free View Stereos
There are several methods, of various levels of complexity.
Method 1: If you wear reading glasses, put them on. Move your face to a comfortable close reading distance from the photograph below (for me this is about 30cms or 1 foot away), nose aligned with the centre stripe, eyes level and parallel with the screen surface.
Now, without moving your head, pretend you're looking into the far distance, behind the photograph, behind the screen, behind the wall even. Do not focus on the picture! You will probably see two overlapping images floating in space, not quite coming together. Persist in looking into the far distance, and with a bit of luck the two pictures will suddenly become one clear picture in the centre with a 'ghost' image on either side. At this point, you will have the distinct illusion of looking through a window at the the glamorous Bibi in her magnificent Hispano-Suiza.
Method 2: If you don't succeed immediately, it will definitely help to hold a piece of stiff card from your nose to the centreline of the pictures, so that the right eye can only see the right image, and the left eye can only see the left image. Tiny movements of your head can also help to align the two images correctly. It's not easy and will take patience unless you're very lucky.
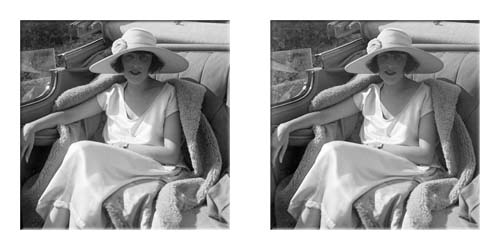
Bibi in the Hispano-Suiza, 1920
Method 3: This method is slightly more complicated. Print this page of the website from your browser. Then fold the sheet of paper so that the photograph of Bibi is at the top of the page. Now face a window with a clear view outside. Stare out of the window at the view and bring the photograph up to just below your eyeline, at comfortable reading distance.
While continuing to look into the distance, over the top of the picture, move it up into your line of sight so it's blocking your view. Do not refocus on the photo - continue looking into the distance at all times. After a second or two you should see a square 3-dimensional image emerge in the centre of the photograph.
Keep trying if you don't succeed immediately. Move the paper down, stare into the distance, move the picture back up without refocusing. As before, it can help if you also hold a piece of card between your eyes, so each eye can only see one image of the photograph.
Method 4: Finally, if all else fails, try the tube method. Form a sheet of A4 paper into a roll along the short side, so it overlaps by about 30mm and sellotape it into position. This will make a cylinder about 55mm (2.5 inches) in diameter and 300mm (12 inches) long, but the dimensions aren't critical. Make a second one. Two tubes from the centre of rolls of paper towels will do pretty well if you have them.
Holding the two cylinders together like a pair of binoculars, put the ends exactly over the two photographs. Bring your eyes up to the other ends. You will initially see two circular images, but if your eyes are properly relaxed and looking into the distance, you should be able to make the two round images overlap and then fuse to make a 3D view. Once you know what this feels like, you should with practice be able to remove the tubes without losing the 3D, and then eventually perform the whole operation with just a single separator sheet, and finally without any external aids at all. Phew!
More Examples
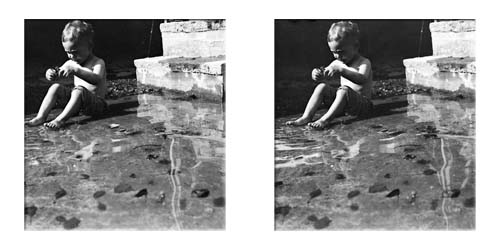
Little boy playing in a pool - a previously unpublished image
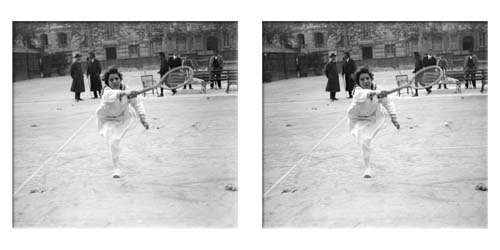
Suzanne Lenglen, Nice, 1915 - the great French tennis player at full stretch
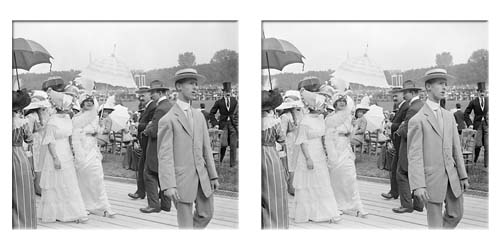
Mannequins at Auteuil, Paris, June 1912 - haute couture finds some admirers
To the top